If you are like me, you are looking at Facebook every day.
And there is a lot to see, especially if you are a cooking/crafting/gardening/decorating sort of person – which I am.
A few months ago I saw a really cool craft that could be used in the garden. It is a decorative piece that can be as personal as you want it to be.
What am I talking about?
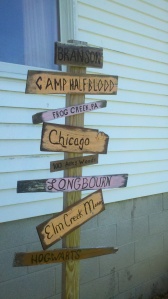
My Brand New Sign Post.
Tada!!!!!
Now I know what you are thinking.
I want one too. That is Soooo Cute!!! Was it hard to make?
To be honest it really was not that hard to make. First off, I had the 2x4x8 already standing up in the ground. It was meant to hold up an air conditioner but stayed when the air conditioner died.
The next part was gathering the wood pieces for the name plates. At some point my neighbor was remodeling their house so some slats stayed in my yard. Another neighbor was tearing down wood siding. Some pieces came from the burn pile my husband keeps around.
The next part was even easier. I sanded down those pieces on the side I wanted to paint to make it smooth and accepting of the paint. I ran a damp cloth over each piece to remove dust from the sanding. Then I made a list of the different places I wanted to put on a sign board.
However, how I did the next part was a part of the learning process. I lettered most of the boards. And that part was fun because I changed font styles for the different places. I used FolkArt Outdoor Acrylic Paint by Plaid for the letters. Another lucky coincidence? My son is a paper boy so I have lots of brown craft paper to use under my painting projects.
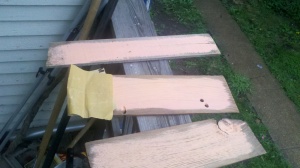
Just before making the last three name signs I realized I wanted a little color on them to make the letters stand out more. So I found some peach color paint and used my pounding brush to apply the color. After the paint was dried, I used a fine grade of sand paper to remove some of the paint to make the wood look a little distressed.
I really liked that effect. When I tried it on some of the pieces I had already painted, the effect did not turn out well. I should have sanded more of the first bit of lettering off. Instead, I soldiered on with a new coat of a pale pink and lettering in the black outside paint. Once it was all dry, I sprayed each board with a clear glaze.
All that was left to do was to have the husband pound nails into the boards while I held them at jaunty angles with the back of the boards level with the 2×4. The finished product looks great. I am not usually successful with projects like this but this time around, I have a winner.
Have you tried any of the ideas you have found on facebook or pintrest and have had success?
Supplies:
Paint Brushes
Fine Grade Sand Paper
Seven thin wood pieces the shape and size of a street sign
Acrylic Craft Paint in your choice of colors for background
FolkArt Outdoor Acrylic Paint by Plaid for the lettering
Clear Glaze Spray Paint
2×4 in the length of your choice
Nails and Hammer
Husband or willing person to use hammer and nails


You rock! This is so adorable.
Thanks! This was a fun project that I did over the course of a few months. During Mother’s Day weekend I decided to finish it up and, well, voila!
CUTE!!
It was a lot of fun. Just deciding the name plates made it very personal.
I love, love, LOVE this idea! I’v seen similar signs in tourist places, but never thought of making my own and putting it in my garden. Thanks for the idea! My mind is abuzz with possibilities! 🙂